Quality control

(Courtesy of Eines Vision Systems)
Fault finders
Peter Donaldson talks to quality control technology suppliers about how they are adapting to the transition to EVs
In a recent study of new-car quality, consumer intelligence company JD Power found that owners of battery EVs and hybrids report more problems than those of IC-engined vehicles, with BEVs averaging 240 problems per 100 vehicles and PHEVs 239, compared with 175 for IC vehicles. While more faults are to be expected in an industry gearing up for mass production of vehicles that embody complex new technologies, it is worth examining the issues and potential solutions from the perspective of quality control (QC) and inspection experts.
Dominique Scheider, manager of transportation strategy and marketing for the EMEA region at Rockwell Automation, says that the more moving parts a vehicle has, the greater the potential for quality problems. Hybrids are much more complex than IC-engined vehicles, he says, but he points out that BEVs have fewer parts, so they should suffer fewer failures.
However, mass production of BEVs is only about a decade old, and it is a highly innovative segment in which software changes rapidly and is sometimes updated on the fly. “These cars are often more or less rolling testing laboratories, capturing and sharing data as they are driven,” he says.
“This results in unfavourable reports when comparing EV start-up quality with legacy car makers. The latter are much more conservative, and feature innovations with full quality control as part of their development cycle, whereas new BEV manufacturers are detecting faults and improving quality as they go along.”
Gareth Tomkinson, from Renishaw, which supplies data-driven manufacturing systems and software, says the relatively new and unproven nature of many components in EVs brings an inherently higher risk of failure. He adds that many of the methods used to process and assemble them are also new, and plants have yet to learn how to get the best out of them.
“Also, manufacturers are in a race to gain an ‘early to market’ advantage, so there is a temptation to take shortcuts,” he says. “The most significant engineering challenges are in the battery and electric motor, and although they aren’t brand new technologies, their use case and performance specifications are higher than any previous commercial application at this scale.”

Antoni Perera i Vernetta, engineering manager and business unit leader at Eines Vision Systems, which specialises in machine vision-based inspection technology for quality control, adds that a further complication stems from the high level of integration between components in a BEV or a hybrid, because a problem in one component is more likely to affect others.
E-axle assemblies, for example, are increasingly closely integrated, making inspection more difficult, and are large and heavy so they impose special handling requirements, according to Kiyoshi Murakami and Brad Ward of industrial automation and inspection provider Omron. They add that this has had a direct impact on the development of the company’s X-ray inspection systems and of material automation systems such as its mobile robots.
Also, automated manufacturing specialist Vantage Corporation’s Brandon White points to a lack of knowledge among consumers, particularly about maintenance. However, he considers these to be short-term problems of transition. “As manufacturing technologies adjust to new component designs, product design matures, and consumers become more familiar with EV technology, so the QC problems should fall in comparison with their IC engine counterparts,” he says.
While there are many manufacturing similarities between EVs and IC vehicles, there are also major differences in the manufacture, integration, assembly and installation of the powertrain, our experts point out. Perera i Vernetta says assembling the electric motor and transmission, the battery pack and the power electronics requires specialised equipment and demands higher levels of precision. The software-defined nature of EVs also makes a big difference, with numerous software systems that must be tested individually and as an integrated whole.
‘New’ status quo
(Courtesy of Zeiss)
Scheider argues that newcomers to the automotive industry are challenging manufacturing concepts that represent a 50-year-old status quo by rethinking the entire process including the final assembly. “Why not place the seats on the battery pack before the final assembly of the chassis structure?” he says. “Why mount and paint the doors with the chassis, then remove the door for assembly?”
QC relies heavily on inspection and measurement, and in mass production environments, measuring fast enough to control the key factors that affect vehicle performance is critical, Tomkinson says. He points out that motor and gearbox efficiency are pushed hard to maximise range and/or minimise the required battery capacity, so tolerances are tight.
“An example of this is the air gap between the assembled rotor and stator. If the gap is too large, the motor has lower efficiency; too small and things can overheat and even seize. One challenge is to measure these dimensions fast enough to keep pace with the short takt time [the rate at which a product needs to be completed to meet customer demand] of the production processes,” he says.
“Historically that wasn’t possible, so sample inspection was used, with a rate of 1 in 100-250 being common. However, modern inspection technologies are fast and accurate enough to achieve this, or at least drastically reduce sampling rates to better control these critical features.”
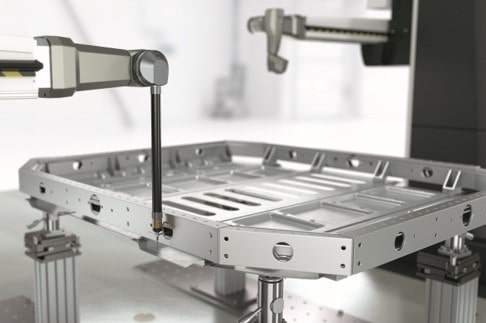
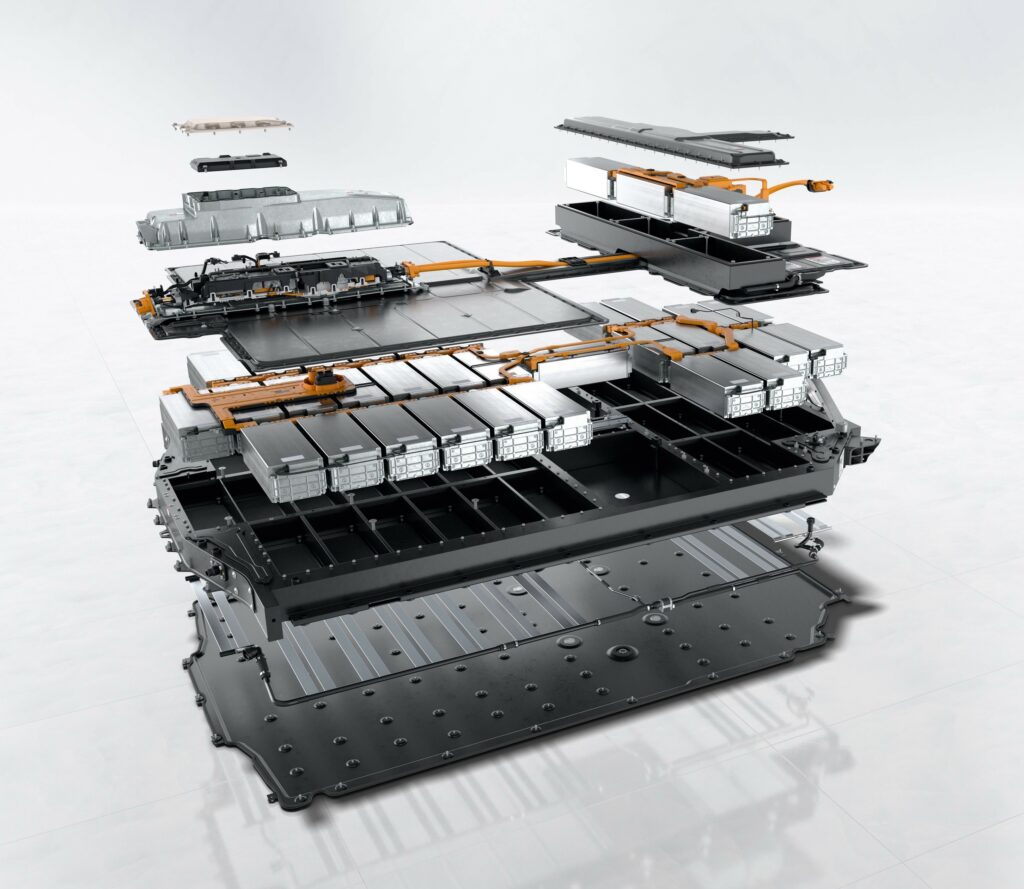
One area on which Vantage focuses its QC technology is battery trays and assemblies. Because these components are very large and are subject to dimensional variation, they have to be measured at hundreds of points on hundreds of features, White explains.
Manufacturers therefore struggle to find QC technology that can keep up with rapid production cycles, and relying on frequency (periodic) inspection is not an option, he argues, as 100% of the features must be verified. This is pushing manufacturers towards the latest visual inspection solutions including 3D computer vision technologies.
Vantage also inspects EV transmissions, which come in for more intense scrutiny for noise because they are no longer acoustically masked by an IC engine. “We are seeing tighter tolerances on EV transmission components than their IC counterparts,” he says. “To meet these tolerances is a challenge, and manufacturers are looking for faster, more precise QC methods that can collect reliable data.”

(Courtesy of Omron)
Automating QC
With products as complex as EVs, QC must be highly consistent to ensure their safety and efficiency, and automation improves that consistency, Perera i Vernetta at Eines says.
“Automated QC ensures that every product is inspected and tested the same way every time, reducing the potential for human error and variability,” he explains. “This helps manufacturers to identify and address quality issues more quickly. Second, EVs contain high-voltage components, and automated quality control equipment can detect potentially dangerous defects or malfunctions.”
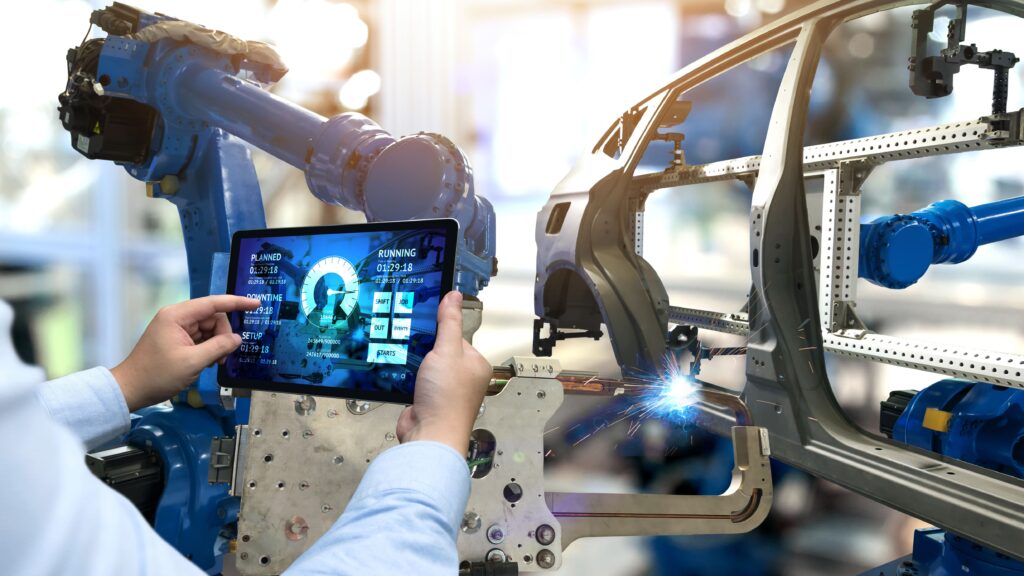
Automated QC is also a natural fit for automated manufacturing, Tomkinson notes. Automation can encompass stages such as the movement and orientation of parts, the selection of inspection programmes, RFID chips or parts recognition, the operation of safety controls, and updates or adjustments to machine tool offsets.
Most processes used in automated manufacturing have QC aspects inherent in them, enabling reduced scrap rates, eliminating manual labour and providing higher frequencies of inspection, Tomkinson adds.

He explains that the dimensional information captured on or near a machine making a part soon after the machining process enables automatic micro-adjustments to the tool before the next part is made. That helps to keep features in the middle of their ideal tolerance band, based on the last component produced. “We are talking low single numbers of microns,” he says.
Murakami and Ward say 100% inspection requirements – the need to inspect every manufactured part at each stage of production – are leading to in-line inspection during manufacture, and pushing inspection suppliers to ensure test speeds can keep pace with production without sacrificing quality. This, they add, also makes automated inspection more important, particularly for non-traditional automakers.
In some EV subsystems, inspecting every part is essential as correcting any mistakes is impractical, Tomkinson adds. Assembling a motor with uninspected parts, for example, risks having to scrap the whole assembly, because it is not viable to rework them.
“Automated QC provides a reliable method of interim checks, and prevents scrap parts from progressing further through the manufacturing value chain. Often it isn’t practical to do these checks manually, owing to labour costs and the general disruption to the process.”
(Courtesy of Audi)
Impact of software
The increasing reliance of EVs on software for their core powertrain functionality as well as advanced driver aids and comfort/infotainment features has a major impact on QC, Perera i Vernetta at Eines notes.
The software’s growing complexity makes it more challenging to design, develop and test, increasing the risk that defects and vulnerabilities are introduced, and creating the need for more rigorous QC. “Also, EV software is integrated into many different subsystems and components, making it more challenging to test and debug,” he says.
Renishaw’s Tomkinson points to the complex interaction of software and hardware throughout the production life of a vehicle family as a key issue to be faced. “The development ‘clock speeds’ of the many electronic control modules used throughout the car are often different,” he says.
“When a unit becomes obsolete or is replaced by a superior technology, they need to be seamlessly phased in during the life of a range of models and variants. That makes testing every combination and use case a considerable challenge. All of this is compounded by the pressure to get to market quickly.”
However, advances in computing power and software are also part of the solution, Perera i Vernetta argues, pointing to improved data analytics. “Advances in AI and Deep Learning are allowing us to analyse large amounts of data generated by measurement and inspection technologies, providing insights into trends and potential issues that would be difficult to identify using traditional methods.”
Scheider concurs, looking to a future perhaps defined by connected, autonomous, shared and electric vehicles. “Quality relies on sensors, data and statistical models, not only during the manufacturing process but also through the entire lifecycle of the car,” he says.
“Vehicle data used to be available only when the car was at the garage for its service and maintenance check. Now though, cloud computing can run predictive modelling on each car, accounting for the behaviour of each individual driver. Quality failures can now be detected or anticipated in advance, based on real-time data.”
Tomkinson emphasises the growing importance of flexibility as well as automation in quality inspection systems. He points to a growing impetus to adopt automation owing to the shortage of operators caused by the Covid-19 pandemic, and by the trend in western countries to bring production back from regions with lower labour costs.
He argues that large up-front capital investments in automated lines are only financially viable when they are amortised over large production volumes, and that they are put at risk if inspection systems lack the flexibility to cope with new EV designs.
“It is important therefore that systems are flexible enough to cope with the evolution of new EV parts,” he says. “Against this backdrop, dedicated gauges designed specifically for a single task begin to look limited.”
Vantage’s Brandon White notes that measurement technologies are constantly developing to meet the needs of automotive OEMs. “For EV components, and complete vehicles specifically, a major focus has been further developments in flexible vision-based non-contact measurement systems that provide 3D data in a point cloud format for analysis, enabling inspection of a number of components or variations in a single system,” he says.
“With EV designs continuing to be revised, and EV sales bringing uncertainty about production volumes, manufacturers are looking to find solutions that are flexible and can handle a large number of different products with minimal tooling and capital investment when a design changes or volume shifts are made.”
(Courtesy of Rockwell)
Design for inspection
Efforts to integrate quality control into manufacturing processes must include designing vehicles and all their subsystems and components with inspection in mind, which is a challenge in periods of rapid technological change.
Murakami and Ward at Omron attest that traditional automotive manufacturers generally pay adequate attention to design for inspection, but the EV industry is not quite there. “While the priority may not always be a friendly design for inspection, there is a dance between suppliers and inspection, often driven by the automotive industry, to improve design to make inspection better while improving inspection to minimise design constraints.”
Perera i Vernetta at Eines argues, “QC standards and requirements are constantly evolving as technology advances and new regulations are introduced, and this create a knowledge gap for suppliers who may not be aware of the latest QC requirements. Also, some suppliers might prioritise cost reduction and time to market over quality control.
“That can result in components or subsystems that are not thoroughly tested or inspected before being delivered to the EV manufacturer, which can increase costs enormously. To face these challenges, OEMs must work closely with their suppliers to ensure that quality control requirements are clearly communicated and understood.”
For example, Rockwell has developed turnkey end-of-line quality testing systems for seats, working with the largest Tier 1 automotive seat makers, but even with close cooperation, there is still a tension between functionality and QC testing requirements, according to Scheider. “The socket below each seat is designed to be plugged into the car, not into our quality testing station, resulting in additional complexity and cost for the machine. A better socket design could resolve this,” he says.
“In short, EV designs do not yet take the measurement methodology into consideration that much, as the focus is largely on assuring that a new product is reliably manufacturable,” White says. “However, as the products continue to mature, we believe this will unfold in time as a consideration in the design process.”
Good designs exhibit the right balance among a range of considerations, according to Renishaw’s Tomkinson, and include cost, performance, manufacture, inspection and in-field maintainability.

“There is a growing understanding that inspection operations can’t simply act as a ‘quality goalkeeper’ at the end of the production line to prevent bad components reaching the consumer,” he says. “Instead, smart processes invest in interim dimensional checks that not only pass or fail components but, more important, use the data gathered to make micro-adjustments to upstream processes in real time and improve the overall manufacturing process.”
That raises the question of what can be and is being done to make EVs easier to inspect for quality by design. Perera i Vernetta argues for standardisation, which can simplify inspection processes by ensuring that all parts are designed to a uniform set of specifications that allow key parameters to be measured. He also notes that simplifying designs, thereby reducing the number of parts and interfaces in a subsystem, makes them easier to inspect.
Designing with traceability in mind is also crucial, as it makes it much easier to identify and isolate potential quality issues. “This can be achieved by incorporating unique identifiers such as barcodes into the design of each component or subsystem,” he says.
Murakami and Ward agree, adding that to male X-ray inspection easier, designers should carefully consider material types, densities and thicknesses to try to avoid the need for deeper penetration to reach key inspection points.
“This can be the deciding factor between achieving basic inspection or high-quality inspection that can detect a wider range of potential defects and quality concerns,” they say. “Also, introducing more inspection points into the production process and feeding the information back into the process and back to designers is valuable. That is what Omron’s Q-Up software aims to do.”
Another angle is to take a realistic look at how tight tolerances need to be, an idea embodied in the aphorism: ‘If you can’t measure it, you can’t make it’. Tomkinson vouches for the truth of this, commenting that it is pointless setting a tolerance that is so tight that no measuring equipment can practically inspect it.
“However, it would be defeatist to simply accept that and stop there,” he says. “Instead we should consider how important the tolerance really is to performance.”
Minimising contact
Non-contact measurement and inspection systems are becoming increasingly important for QC in EV manufacture, as many components and subsystems are highly sensitive to damage, Perera i Vernetta points out. “Today’s vision systems, with cameras and properly developed software, are capable of inspecting with high accuracy,” he says.
Brandon White at Vantage points to their adaptability, noting that non-contact measurement systems have minimal to no fixed tooling and can be reprogrammed through software to adjust for design or product changes without requiring physical tooling.
Murakami and Ward say non-contact measurement is crucial because it eliminates the risk of damage from impacts inherent in contact-based systems, and because it does not encounter the physical access limitations and time constraints that prevent contact-based systems from achieving 100% coverage.
“Contact-based inspection typically tests product quality in the moment,” they say. “However, visual based inspection, like 3D AOI or AXI [Automated X-ray Inspection] can determine quality and identify active defects as well as indications of failures that might occur later, in the field.”
Although non-contact measurement systems are not as accurate as contact methods, broadly speaking, they are ideal for cases where speed of data capture is valued more than accuracy, according to Tomkinson. “For example, large body panels that don’t have tight tolerances are best assessed with camera-based or laser-based systems. On the other hand, electric motor components like stator and rotor diameters with tolerances of low numbers of microns demand tactile inspection.”
“To get the best of both worlds and help consolidate multiple inspection operations into a single set up, a multi-sensor approach can now be taken using coordinate measuring machines (CMMs). Five-axis technologies give CMMs increased inspection throughput but also the ability to automatically switch between different sensors such as touch trigger, touch scanning, optical, ultrasonic thickness and surface roughness sensors.”
(Courtesy of Porsche)
Inspection-friendly design
Given the growing significance of non-contact QC inspection technologies, it is worth designing EV components with them in mind, White argues. For example, body panels and large-scale structural castings would greatly benefit from sets of datum points that can be located reliably using such technologies, he says.
With traditional contact-based measurement methods, it was typically essential to locate datum structures by, for example, clamping them to pins. Now, however, with non-contact systems these datums can be measured using non-contact sensors to establish a coordinate frame. “If designers were considering this in defining their coordinate frame at the design level, the correlation and reliability of measurement could be greatly improved in many cases,” White says.
At the systems level, improving ease of inspection starts in product life-cycle management, which Scheider characterises as the single version of truth for the master bill of materials. The process continues downstream when data gathered by the manufacturing execution system is processed to find the root cause of any failures during testing.
Third, with reference to BEVs in particular, the battery passport concept, when realised, will provide a full genealogy of raw materials and their transformation. “With that, quality engineers will have a gold mine of data to explore and, in addition to the well-known quality approaches, AI will be part of the solution to establish the best models,” Scheider says.
In the meantime, the evolution of QC measurement and inspection instruments continues. Renishaw, for example, which invented the original touch trigger probe for CMMs in the early 1970s, recently introduced its REVO 5-axis measuring head for them.
This captures data at measuring tip speeds of up to 500 mm/s, a major improvement over three-axis machines that commonly achieve 10-20 mm/s, he says, along with multi-sensor flexibility that was not previously available. It can, for example, automatically switch to a roughness sensor housed in a change rack on the machine.
Another trend is towards replacing many single-purpose ‘hard’ measuring instruments with reprogrammable devices such as Renishaw’s Equator flexible gauge, a factory floor tabletop instrument designed to measure parts of many different sizes and shapes over a wide range of temperatures. Equator uses a contact probe system that is calibrated and temperature-compensated using a ‘golden master’ component.
Vantage began r&d work 8 years ago on non-contact methods of measuring battery trays, and assembled batteries using flexible 3D scanning. Its Part to 3D system now enables manufacturers to turn an entire battery assembly, tray, or packs, into a CAD model in under 60 seconds, says White. The system allows measurement of more than 250 points using software with which surfaces and request measurements can be obtained, then automatically send the measurement data to a factory information system.
Information technology is central to QC in factory environments, and Rockwell offers software-as-a-service from its Plex subsidiary. The Plex Quality Management System helps manufacturers generate process control plans with detailed inspection instructions and digital check sheets that are closely integrated with product specifications.
Scheider says, “You can manage and track documents, such as engineering and material specifications, to maintain a detailed list of compliance requirements, and regulatory compliance is supported easily across workflows.”
Development at Omron is driven by what it calls its 5-Zero philosophy, which aims at incrementally reducing five undesirable things to zero, namely equipment downtime, design constraints, wasted worker time, false failures and defects, and the company is introducing more AI and deep learning capabilities to support inspection.
“These tools are making decisions, using real data, not only to improve the inspection approach, better detect defects and improve product quality, but also reduce programming time and skill-level requirements as well as operator time.”
It’s clear that automotive QC is going through a major transition as it adapts to large-scale manufacture of BEVs and hybrids, and the trend in the number of problems per 100 vehicles reported will be an important indicator of its progress.
ONLINE PARTNERS


